This is my harvest/Thanksgiving centerpiece. What I used was:
- Pretty tree branch
- Ceramic gardenening pot
- Burlap fabric
- Floral block
- Rice
- Bag of burnt orange, ivory and green buttons
- Flowers from cheap fake floral bouquets
- String
- Hot glue
- Strings from burlap material
Earlier this week I found some very nicely shaped branches in our park while on a walk with Wallace, which originally inspired this idea. Since harvest is one of my favorite times of year, I decided not to wait until Christmas to try out this concept that I had brewing in my head.
As far as how to do the tree, here's the basics:
- Burlap: Leave about 8 inches around the pot for the burlap and cut a square. Then gather the top and shove the ends into the opening of the pot. While you're doing that, you can put ribbon or whatever you have on hand towards the top of the pot to secure the burlap. Then untuck the burlap if that is what you're going for.
- Floral Block: Fit the floral block into the flower pot snugly so that it doesn't move
- Branch: Put the branch into the floral block, use hot glue to secure if necessary
- Flowers: Pull flower pieces from floral bouquets
- Flowers: Hot glue flowers onto appropriate branches (should be on the ends so that it looks natural)
- Buttons: Hot glue buttons onto each other in various arrangements, making sure you can pull a string through one of the holes in order to hang them.
- Buttons: When button arrangements are dry, string them at different lengths
- Leaves: For leaves, cut the leaves off the floral arrangements, glue a button onto the base of the leaf, loop string through one of the button loops.
- Buttons/Leaves: Hang the leaves and buttons on the tree.
- Rice: Fill the pot with rice to cover the floral pot.
- You're set!
And since I had the burlap and burlap strings out, I also decided to pimp out some other things around the house!
 |
| Mason jars with Kosher salt, tea light candles, and strings from burlap fabric |
 |
| Candles pimped out with various leftover craft items including: burlap, burlap strings, floral leaves and buttons |
Wallace also decided that HE wanted to help in craft time as well. What a beautiful masterpiece that he created:
 |
| He's so creative.... |
While we're talking about Wallace, he not only joined in on craft weekend, he was one of the focuses. On Saturday, it was his birthday! Well, his "made up birthday" would be a more accurate statement I guess. Since he was adopted from a shelter, they told us that he was 4 months old in January. So, we suspect that he was born in September but we weren't sure of the day...so....we just picked the middle of the month. So, September 15th it was and will be!
We celebrated by going on lots of walks that day and baking up a batch of homemade dog biscuits. But the fun didn't stop there. I then proceeded to act like an insane old cat woman. Wallace put on his bow (well I did) and delivered some of the dog treats to his neighbor dog friends so that he could share in the birthday fun. At one of the houses he actually got an impromptu gift, a dog beer. No, I didn't make this up, there is dog beer: http://bowserbeer.com/.
 |
| Yum yum yum! |
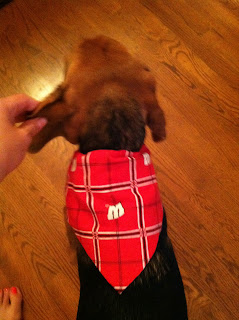
Well, the fun didn't stop there. I also made him a Wisconsin Badgers bandana, that goes through his collar so that he can't untie it or mess with it. SIDERANT: How sad was that Badgres game on Saturday? It was such a dirty feeling win...and I felt absolutely horrible for the Utah kicker. We played so poorly that I was actually hoping the kicker would make it at the end since they played better than us most of the game.
So, how did I make the bandana that slips through his collar? Have a hot glue gun and fabric? Then you're set. While I don't have a pattern or anything, all I did was take his collar, make a shape similar to this, make sure that his collar would go through the fold, and then hot glued the fold where a normal person would sew.
Here's another view. When you are making the pattern, make sure that you look at where the lines and the logos will end up.
 |
| Not sure that he enjoyed me tugging on his cute little ear, but, he kept moving! |


No comments:
Post a Comment